The following post will cover how to add an Admin User to your WordPress database. Typically, you will not need to do this unless you have somehow removed your Admin user from the database. Most of the time, the Admin User’s password will just need to be reset. This process is required if you ever do need to add an admin user to WordPress through phpMyAdmin.
Firstly, you will need to log into phpMyAdmin and locate your WordPress database. In the case you do not know your username, password, or even the name of your database, you can find it in your wp-config.php file, which is found between lines 18 and 26 of the wp-config.php file. It should look like this:
/** The name of the database for WordPress */
 define('DB_NAME', 'yourdb_wp');
/** MySQL database username */
     define('DB_USER', 'youruser');
/** MySQL database password */
     define('DB_PASSWORD', 'yourpassword');
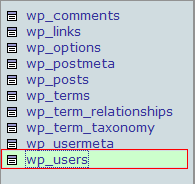
From here, select your database from the database select menu in phpMyAdmin. Your database will be loaded, in which you will now see a list of your database tables. The wp_users and the wp_usermeta tables will need to be changed. Click on the wp_users table to bring up the data for that table. A list of the current users will come up. If you do not have any users, you will see the list of database fields available.
Editing the wp_users table
Using the admin users’ information, a row will need to be inserted into the database. Click on the “Insert“ tab to bring up the phpMyAdmin insert form, and insert the following information:
-
-
- user_login – the username you wish to use to access WordPress
- user_pass – the password you wish to use to access WordPress (be sure to select MD5 from the phpMyAdmin Function menu – WordPress stores passwords with MD5 encryption)
- user_nicename – the name you would like to refer to yourself as (not your username)
- user_email – the email account associated with this user
- user_url – the url to your website, eg.
- user_registered – the date when the user was registered
- user_activation_key – this field can be left blank
- user_status – leave this set at 0 (zero)
- display_name – if you can’t think of one, use the user_nicename
-
Once all the necessary information is entered, click the “Go” button at the bottom of the phpMyAdmin window. You will be redirected to a page that shows the results of your query, and if there are no errors showing, continue editing the wp_usermeta table.
Editing the wp_usermeta table
You will now need to provide privileges so the user can access the WordPress Admin section. This is done through the wp_usermeta table. The id of the user you just created will need to be known to continue. If you don’t know the id, check the wp_users table for it. You will need to insert two rows into the wp_usermeta table; wp_capabilities and wp_user_level. Follow these steps to give your user privileges.
-
-
- Click on the wp_usermeta table to bring up the entries.
- Click on the “Insert“ tab to insert a new row.
- Fill in the following information:
- umeta_id – leave this blank (it is automatically generated)
- user_id – the id of the user you created
- meta_key – insert wp_capabilities
- meta_value – insert this exactly – a:1:{s:13:”administrator”;b:1;}
- Insert another row with the following information:
- umeta_id – leave this blank (it is automatically generated)
- user_id – the id of the user you created
- meta_key – insert wp_user_level
- meta_value – insert 10
- Hit the “Go” button in phpMyAdmin to insert the row.
-
Using the username and password you specified for the user, you should now be able to login to the WordPress Admin page. Once logged in, it is recommended you visit the Users section within WordPress. Click “Edit” on the user you just added, and continue to “Update Profile” at the bottom of the screen. This will allow you to edit the user profile and add any additional information you wish.


